Difference between revisions of "Cooling System"
| Line 149: | Line 149: | ||
Disconnect the three wires from your radiator temp-switch that you installed earlier with the new pig-tail. | Disconnect the three wires from your radiator temp-switch that you installed earlier with the new pig-tail. | ||
| + | |||
| + | Get a short piece of wire to jump across wires for testing. | ||
| + | |||
| + | If you short the R & B you'll get LOW | ||
| + | |||
| + | If you short the R & W you'll get HIGH | ||
| + | |||
| + | If that works then your circuit is good! Just hook up the wires back to the temp switch! | ||
=== Libby Bong === | === Libby Bong === | ||
Revision as of 03:46, 7 June 2016
Contents
Coolant System
NOTE: Before you start disconnect the negative wire to the starting battery!
The van is HOW old? And how important is a coolant system to a functioning engine? The answer is VERY to both questions!
Revamp your coolant system!
- New Radiator
- New Radiator Fan
- New Radiator Temp Switch
- New temp sensor
- New radiator hoses
- New SS Coolant Pipes if you can get them!
The 82 & 83' diesels have a radiator setup that should be overhauled to the newer setup.
The main differences between this setup compared to the later vanagon radiator setup is the following:
- Newer radiator shroud (metal) non-ac from an 85-90 van to be safe. The stock diesel one is plastic and not usable
You can use an AC fan-shroud, but you'll need to make an adaptor as shown below.
- Newer lower radiator support brackets 85-90. It doesn't matter if it's AC or non-AC
- New radiator hoses; the return hose is different between the diesel vanagon and the newer setups
References
These were the references I used to get the job done on my van and help another with theirs.
Radiator Replacement
Installation
notes coming soon 06/06/16
Radiator Fan replacement
p/n 165 959 455AM
You will need to use an 85+ radiator shroud (metal) for a non-AC Vanagon.
However, if you can only find an AC based shroud, you can still use it.
You just need to make an adaptor plate for the non-AC fan to fit the AC shroud.
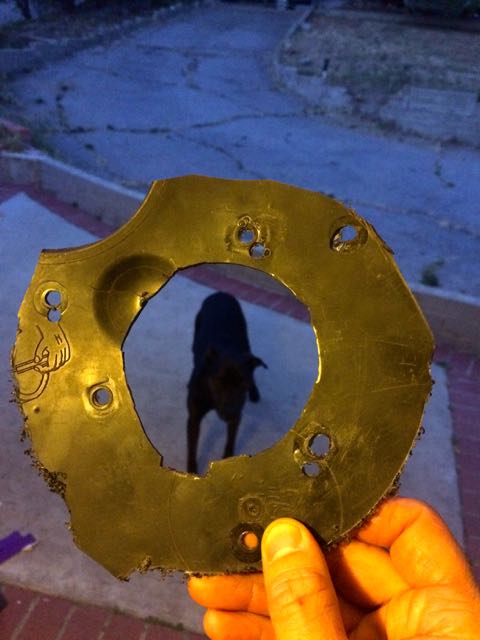
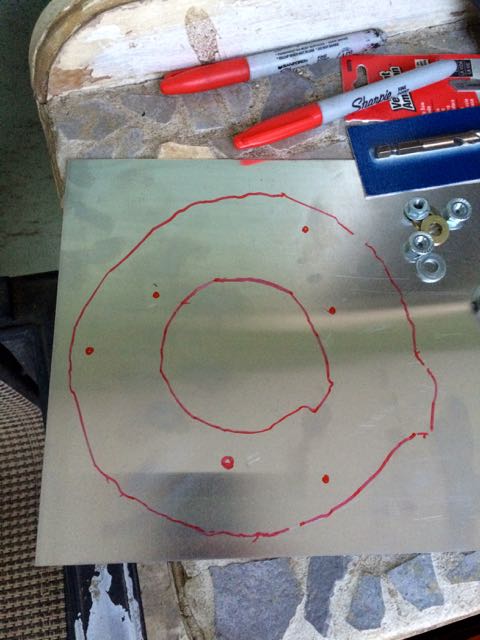
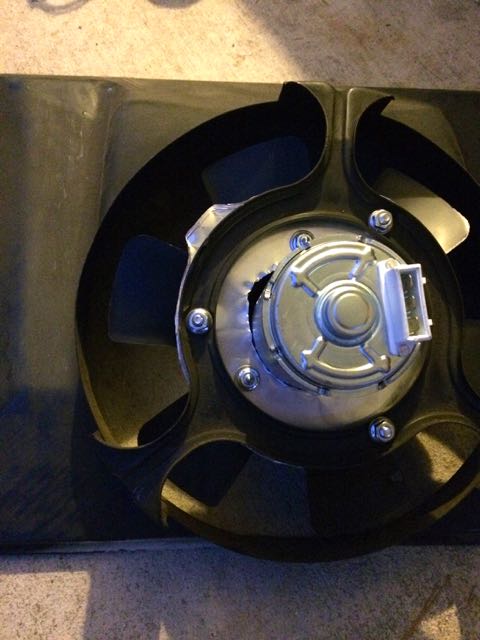
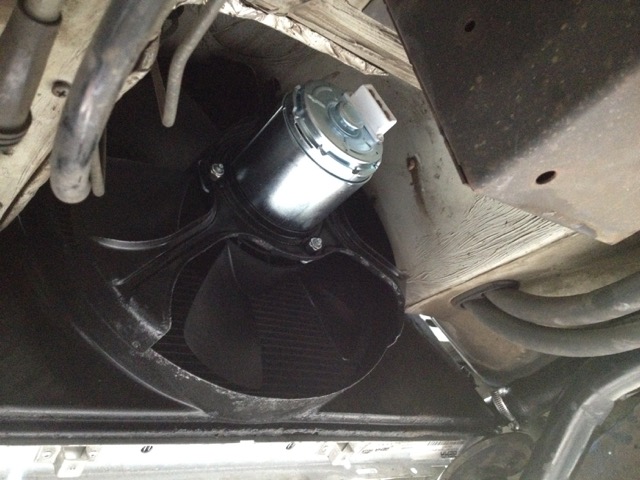
This can be done tracing the File:Diesel-acshroud-template.pdf template. I originally used a bucket lid when I discovered this issue; stoned engineering tricks!
Photo
Original bucket-lid! This made me 2000 miles from STL to LA and then some.
Template marked on sheet-metal; if using thin sheet-metal double up!
Metal sheet-metal version
My original bucket-lid version installed ;)
Radiator Fan Electrical
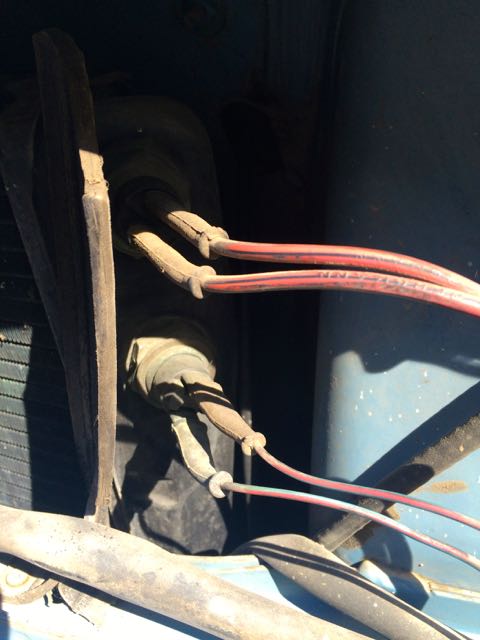
Old Radiator Electrical Setup
So, with the new setup, you'll have only one switch and three wires.
The four wires you see in the photo should be:
two heavy wires - low fan setting
two thin wires - high fan setting trigged from the relay
You'll connect female quick disconnects and connect to the temp switch via a pig-tail.
For this pigtail, I recommend 10g wire with the colors Red, Black, White.
You will need a multimeter or something to determine which wire is hot
Of the two thin wires the one which is LIVE (HOT) is not used anymore. This can be trimmed, cleaned up, bent back, and taped up to not be used anymore.
This leaves you with THREE wires:
- 2 heavy wires
- 1 thin wire
Now, at this point you want to see which of the two LARGE wires is LIVE (HOT)
Now, you need to build your pig-tail
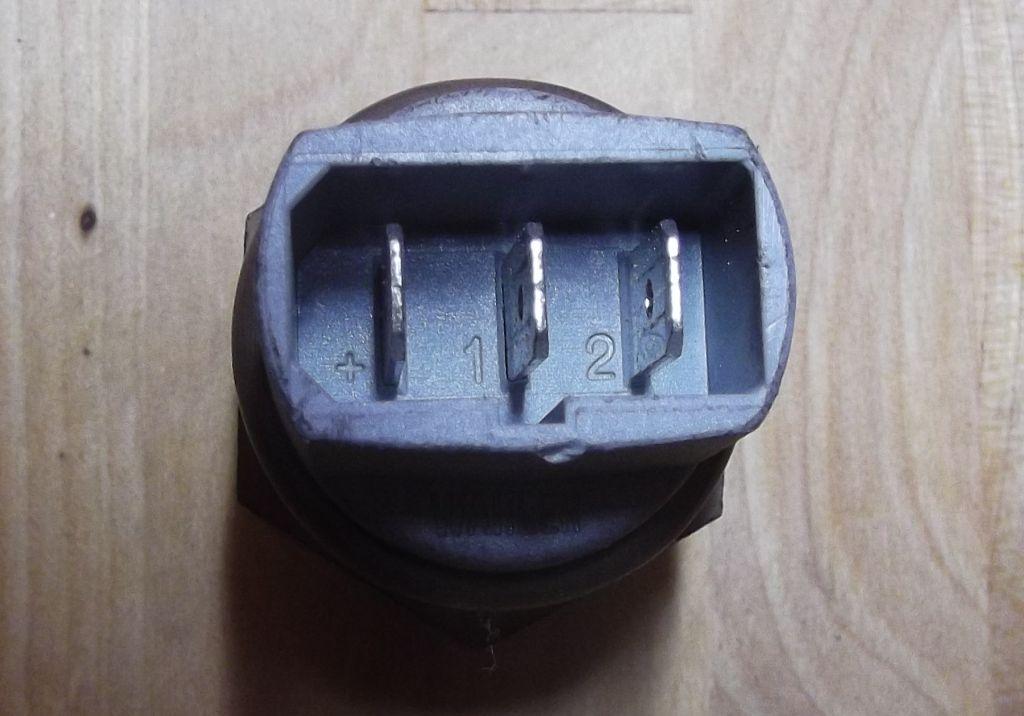
- Heavy wire with constant +12 goes to pin labeled + on the tempswitch (towards the bevels on the end) - RED
- Heavy wire to fan low speed connection goes to pin 1 (center of temp switch) - BLACK
- Light wire to fan high speed relay control goes to pin 2 (furthest away from bevel end) - WHITE
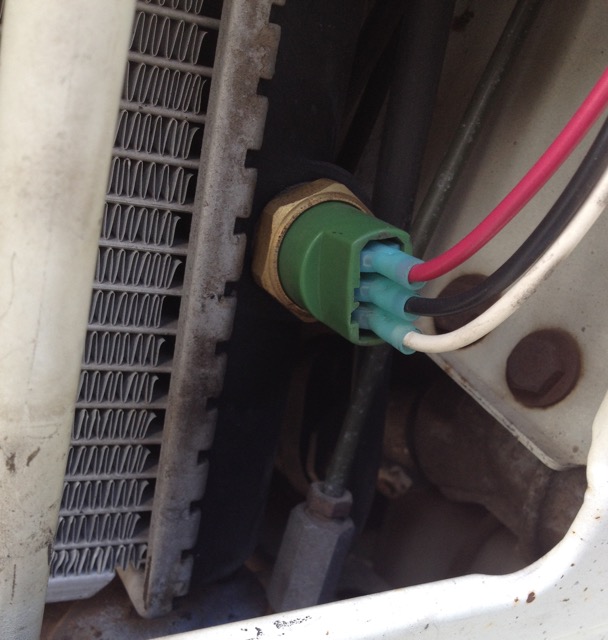
This can be seen in the photo below:
This is how the pig-tail was done when installed
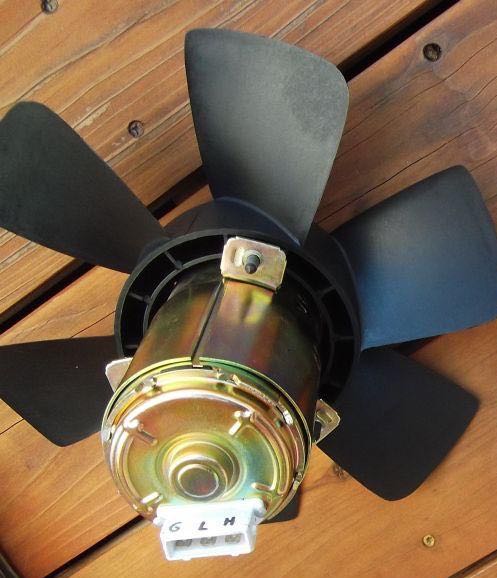
Okay, at this point we'll want to hook up the actual radiator fan.
Cut off the old connector for the rad-fan off the current wiring harness. At this point you'll want to put female quick disconnects on the wires:
The new fan pin-out is:
Now your old plug had three wires:
(Was dark to tell verifying 06/07/16)
BROWN - GROUND
R/BK - LOW
RED - HIGH
Radiator Fan Electrical Testing
At this point you want to test your circuit for the LOW & HIGH fan.
Disconnect the three wires from your radiator temp-switch that you installed earlier with the new pig-tail.
Get a short piece of wire to jump across wires for testing.
If you short the R & B you'll get LOW
If you short the R & W you'll get HIGH
If that works then your circuit is good! Just hook up the wires back to the temp switch!
Libby Bong
1x 2"x30" black pipe(pre cut piece sold at homedepot)
1x 2" to 1 1/2" rubber reducer with clamps
1x 5/16" brass hose barb
10ft of 5/16" silicone hose, couldn't get any smaller quanity.
cost me $15 bucks to make it, plus it looks cool sitting in my garage.

