Difference between revisions of "Betsy Bertha's m-TDI"
| Line 545: | Line 545: | ||
'''Parts:''' | '''Parts:''' | ||
| − | 1 x VW# N012708 - 2sprocket woodruff key | + | : 1 x VW# N012708 - 2sprocket woodruff key |
| − | 1 x VW# 028-115-017E - intermediate shaft (in case yours is broken, don't have one off a used engine, etc.) | + | : 1 x VW# 028-115-017E - intermediate shaft (in case yours is broken, don't have one off a used engine, etc.) |
| − | 1 x VW# N0101371 - Hexagon Bolt M12X1,50X35 | + | : 1 x VW# N0101371 - Hexagon Bolt M12X1,50X35 |
| − | 1 x VW# 027109143 - washer | + | : 1 x VW# 027109143 - washer |
==== Coolant Pump ==== | ==== Coolant Pump ==== | ||
Revision as of 22:26, 26 June 2016
Contents
- 1 About
- 2 The Process
- 2.1 Preparation
- 2.2 Long Block (BoraParts) build-up
- 2.2.1 Engine Cover Plate
- 2.2.2 Intake
- 2.2.3 Exhaust
- 2.2.4 Vacuum Pump
- 2.2.5 CrankCase Breather Valve
- 2.2.6 Oil Filter Flange
- 2.2.7 Oil Filter Union
- 2.2.8 Oil Cooler
- 2.2.9 Oil Pan
- 2.2.10 Tooth Belt Guard Tensioner Roller
- 2.2.11 ABF Serpentine Setup
- 2.2.12 Intermediate Shaft Pulley
- 2.2.13 Coolant Pump
- 2.2.14 Coolant Flanges
- 2.2.15 Injection System Build Up
- 3 The Details (my collected research before above work)
- 4 Parts to Obtain List
About
So, my mechanical experience is limited to working on an 1984 gas VW Rabbit when I was 16 in 1996. I bought that car for a $1! Too bad it was totaled by a mini-van running a red-light.
I'm an IT (UNIX/OpenSource) engineer by trade, but I have been working on my 1982 1.6na diesel Westy since 2012. So, I'm geeky, but new to being a mechanic to my van as much as I can. Some stuff though (brakes/suspension) still gives me the willies, so I like to have someone more experienced do it; I had a bad experience with a brake caliper bolt flying off in m 84' Rabbit that scared the shit out of me!
In this regard, I hope to get a decent engine setup after learning it; then take it to get the conversion done.
Reference Material
Here is my YouTube playlist of videos to this page
Part Reference
1982 VW Vanagon - Part Information - CS/JX
1983 VW Vanagon - Part Information - CS/JX
Part Vendors
Conversion Part Vendors
Berd Jager TDI Conversion parts
Service Manuals
VW; W42-011-294-103B
Bentley; ISBN 10: 0837603668
Forums & Social Media
Follow The Wind Blog involving AC to TDI Swap
Syncroincity AAZ into 86 Syncro @ 50
The Process
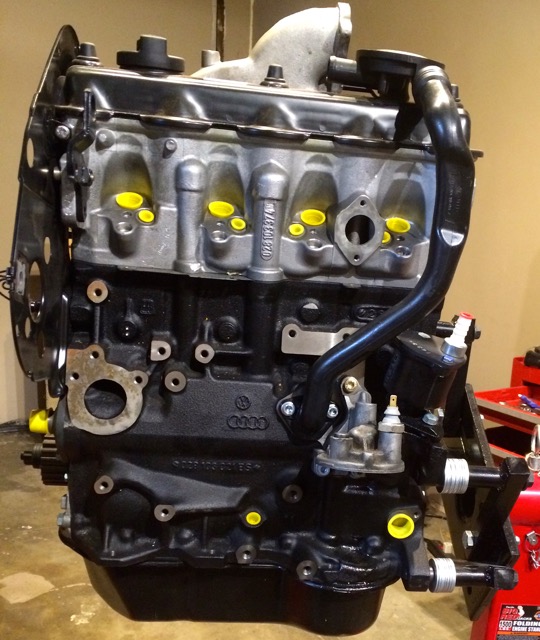
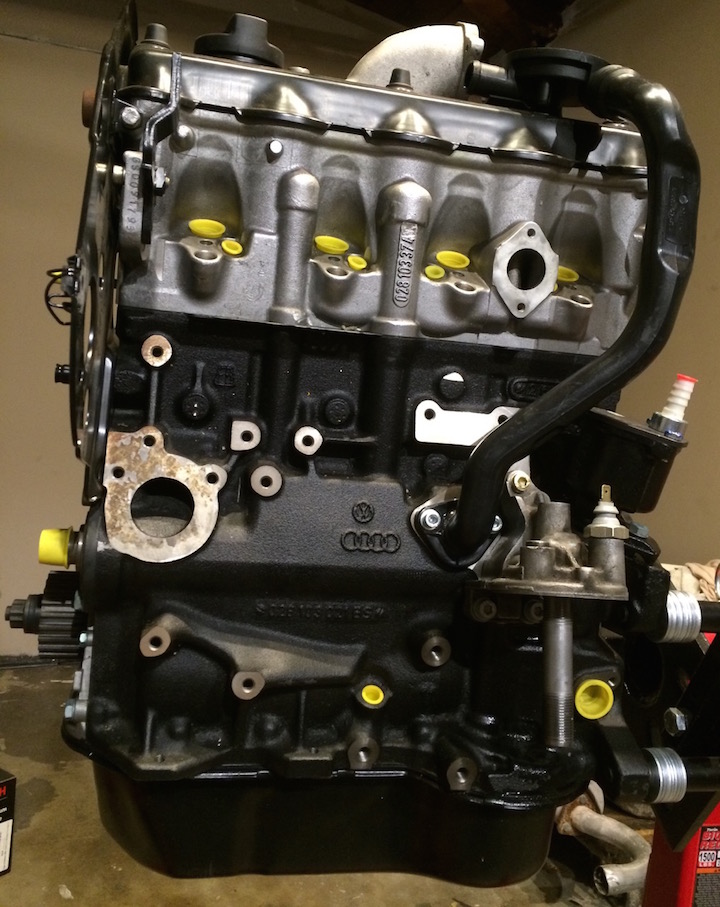
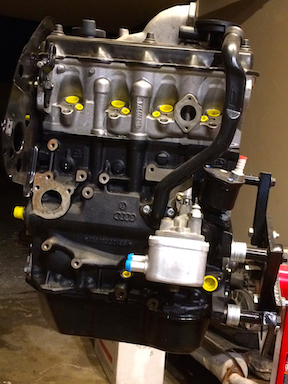
This is where I'm going to linking to my youtube videos regarding my steps of building up a new-long block AHU engine using a used complete engine from Quality German Auto in Ontario, CA as a reference. Then the used engine someday will be either a backup/spare or for another project.
Here is the new long-block and used engine:
Bora Parts 1z/AHU long-block & Quality German Auto used engine - video
Bora Parts 1z/AHU long-block - video
Preparation
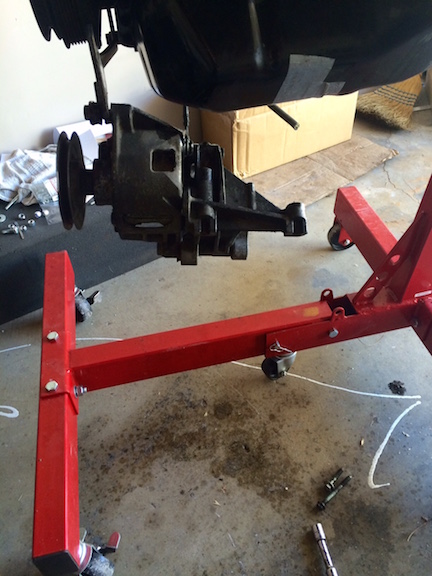
I bought two engine stands identical in the process of mounting the new long-block and the used engine onto for my work.
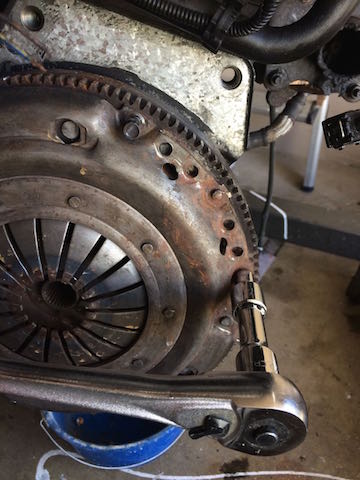
I first had to remove the clutch from the used engine to allow clearance with my mounting hardware to the stand.
Clutch Removal of used engine
Tools: 9mm 12-point socket & 17mm standard socket
Here is a photo of the 9mm removal
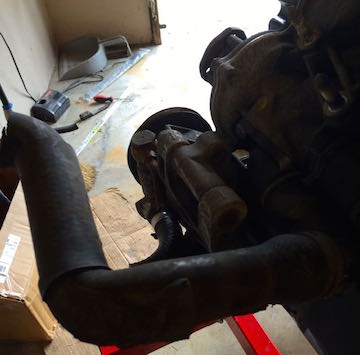
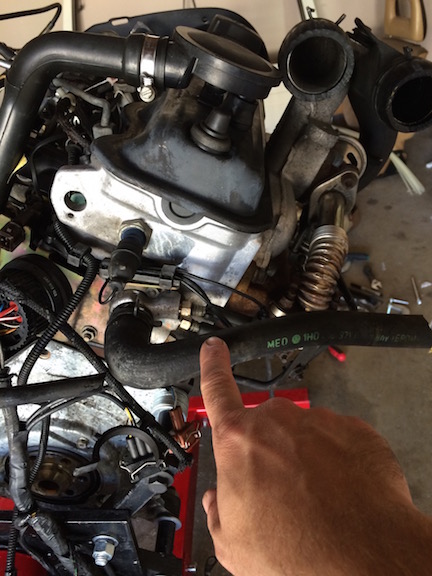
Heater Hoses & Engine Bracket Removal
The assembly is held together by some brackets and one nut head which can be seen below center photo between the two black hoses
Now remove this final hose
Now remove the other coolant hose
Video
Here is the video I made of the part I took off:
Heater Hoses & Engine bracket - video
ECU / Wiring Harness
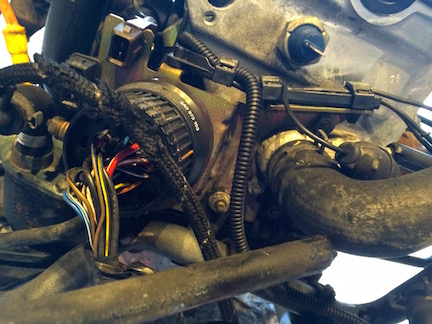
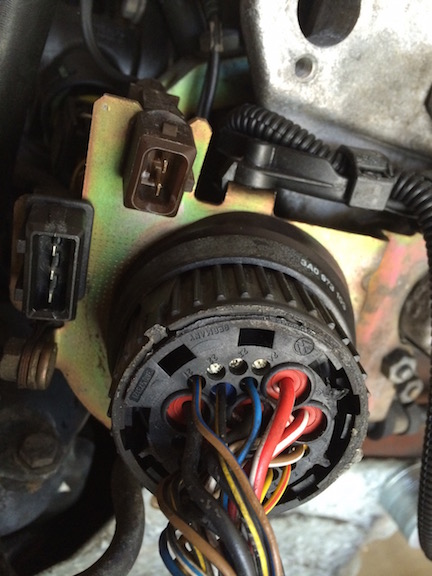
The side of the clutch top center there is a round cluster of wires and other plugs going into a central hub.
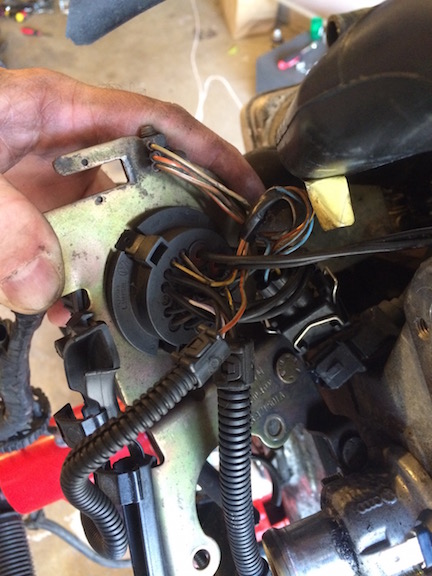
It looks like the below. I was able to disconnect everything but the glow-plug bar. I did the whole counter turn try and remove the plug, but no go. I just snipped the glow plug harness cable.
The rest I was able to unplug and the harness and all the wires came free:
What it looked like trying to get the two glow plug wires free
Videos
Video of what it looked like without the ECU wiring harness
ECU / Wiring harness removed - video
EGR Removal
You don't need the EGR! From what I have been told in the TDI Conversion list was the following from Karl M. @ link Westy Ventures: "In many early TDIs, EGR contributes a lot to the clogging of the intake manifold and ports. Many have deleted or blocked EGR on TDIs to avoid the buildup of nasty gooey carbon. There also is no easy way to control it on an mTDI."
Service Manual Reference
Bentley 26.1 - Exhaust System/Emission Controls
- Bentley 26-6 - EGR
- Bentley 26-8 - 1Z / AHU specific
- Bentley 26-9 - Fig 13.
Videos
Power Steering Pump & Bracket Removal
The power steering isn't needed for the mTDI setup in my 82'. To get the used engine close to what I need to work with, I'm removing it.
That can be done via three bolts. Two at the bracket and one at the swivel.
Service Manual Reference
Bentley 48.15
Video
In the end after you remove the bracket bolts you'll just have the swivel bolt like below
Long Block (BoraParts) build-up
Engine Cover Plate
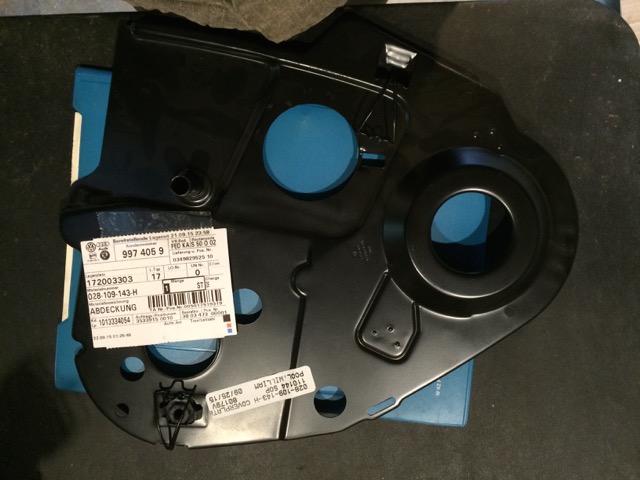
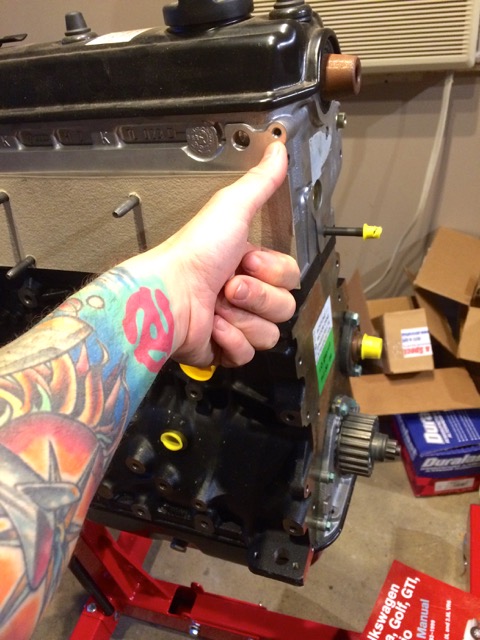
The new-long block didn't come with an engine cover-plate. This was purchased for the engine and the corresponding mounting hardware.
Reference:
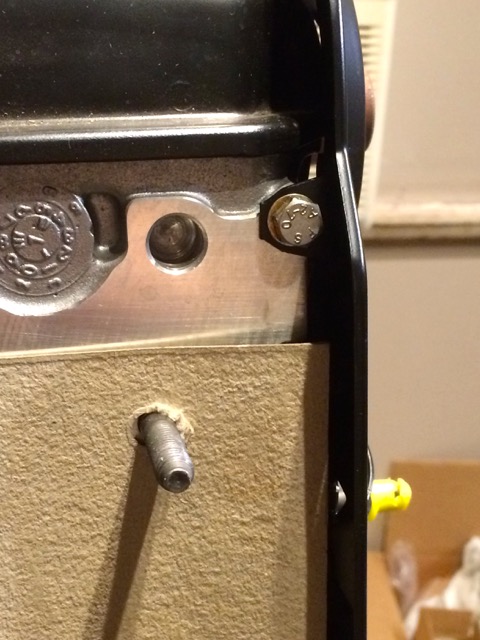
I initially started with the 028109143H cover plate and the two bolts and washers that set it into place (N01021226 & N0122265)
These two 10mm bolts install at a torque pressure of 7ft/lb
Cover Plate
Where my thumb points is where the bolts go to mount the engine cover to the long-block
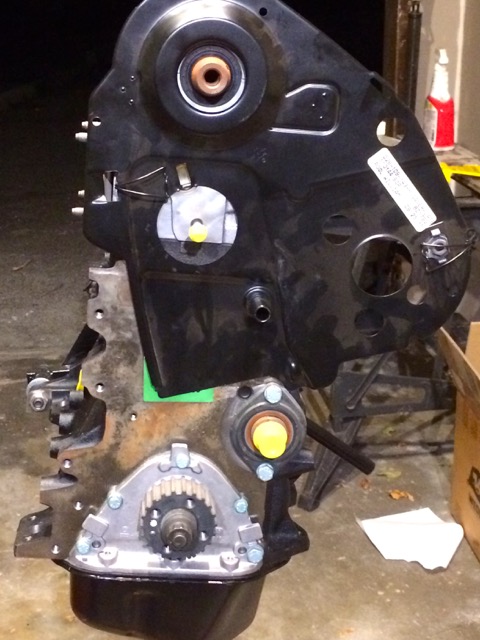
You see how it's mounted from the side:
Mounted from front
Intake
Tools:
Torque Wrench
Allen Hex Bit - H6
References:
VW; W42-011-294-103B 21-6
Use high-temp (2000 F) anti-seize on bolts; blue
Bolt hardware installed at 25Nm (18ft lb) or close to that with a torque wrench
Photos
Gasket Install
The raised side goes towards the intake manifold with the indented side going towards the head
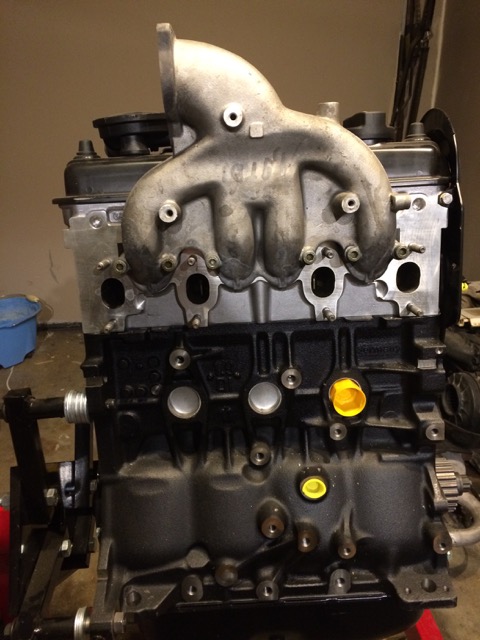
Exhaust
NOTE: Before you start see the EGT Probe section below
Tools:
12mm socket
Torque wrench
Permatex Ultra Copper
Blue LocTite
References:
VW; W42-011-294-103B 21-2
Use high-temp (2000 F) anti-seize on bolts to hold the copper exhaust nuts which are to be torqued @ 25nm (18ft lb)
Gasket Install
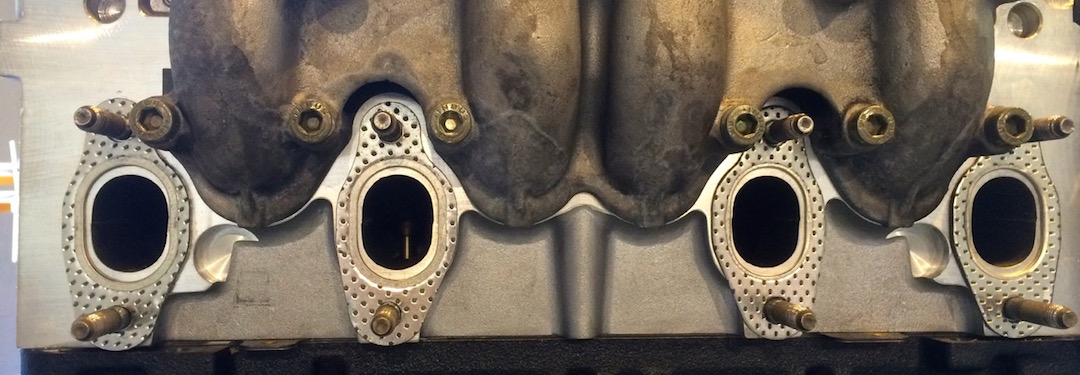
Per Libby: "The metal ring on the exhaust manifold gaskets can face either the head or the manifold and in fact, two *should* face the head and two should face the manifold. There is a horizontal line of symmetry through the exhaust manifold, but if you place a vertical line through the fastener holes, the ports are offset 4-5mm toward the center of the engine. In other words, the two ports on the pulley end of the head are offset toward the flywheel and the two at the flywheel end of the head are offset toward the pulleys. The exhaust gaskets need to be oriented so that the offset is the correct direction. Furthermore, if you look where the gasket surrounds the stud, there is a skinny side and there is a side that has more material. The skinny side should be oriented closer to the intake manifold."
Then a light smear of permatex copper on both sides of the exhaust manifold gaskets
Here is how the gaskets should look orientated before the permatex sealer
Video
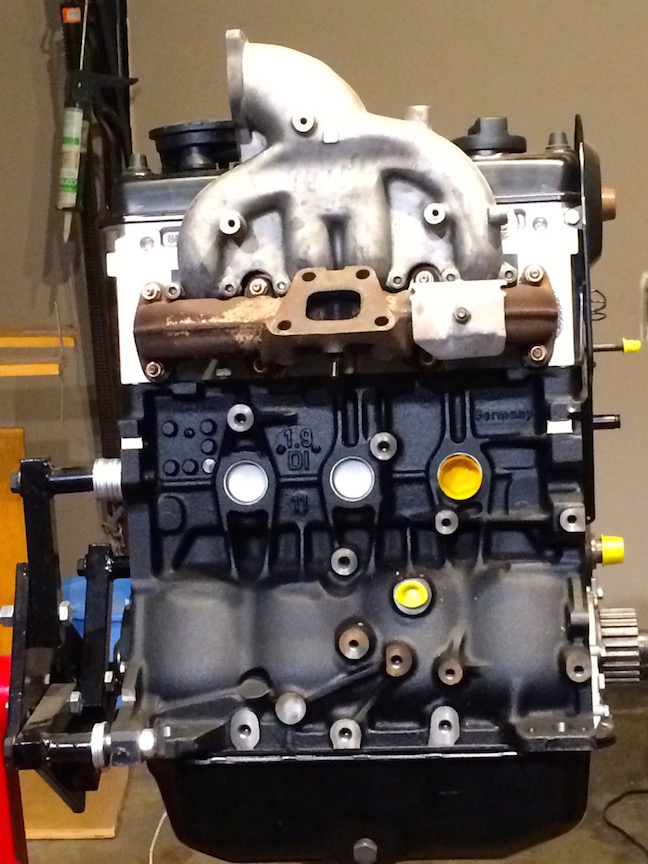
Exhaust Manifold Installation Video
Photo
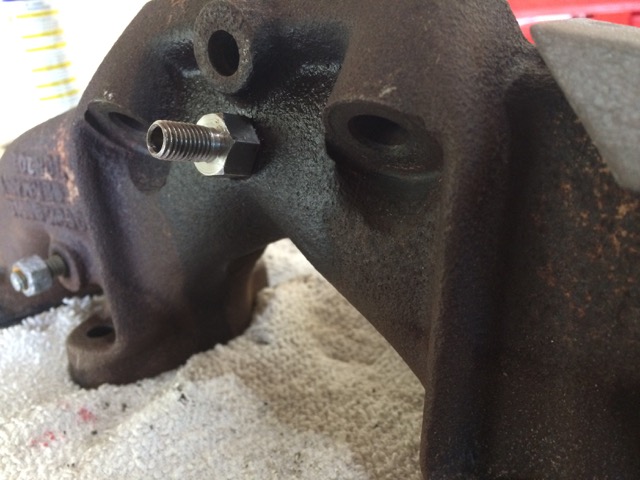
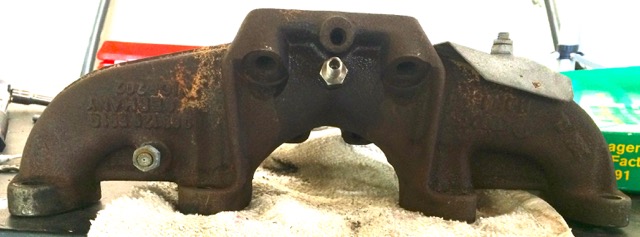
EGT Probe
Reference:
Photos
Vacuum Pump
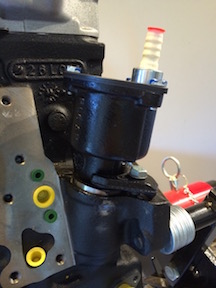
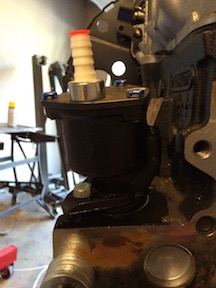
I had made a video, but I lost it. This is a very simple process, so I will just explain it here.
If you look at the end of the vacuum pump you'll see it has a slot. Then when you look into the engine hole a receiver for that slot. The goal is to lube it up a little with diesel oil so it's not totally dry. Then go in the angle of the slot. I usually turn clock-wise till it falls seated. One way of knowing if it's seated or not is you won't be able to see the greenish/gray O-ring as shown in the photos below. Then just tighten up the bolt and bracket. In order to get the bolt to even up enough to screw into the hole for the bracket, you may have to wiggle the bracket a little.
Tools:
13mm open-wrench
Reference:
Photos
Final photos of installation
CrankCase Breather Valve
Tools:
Allen Hex Bit - H6 @ 7ft lbs
Reference:
Blue coded thread-locker was used on tube mount bolts.
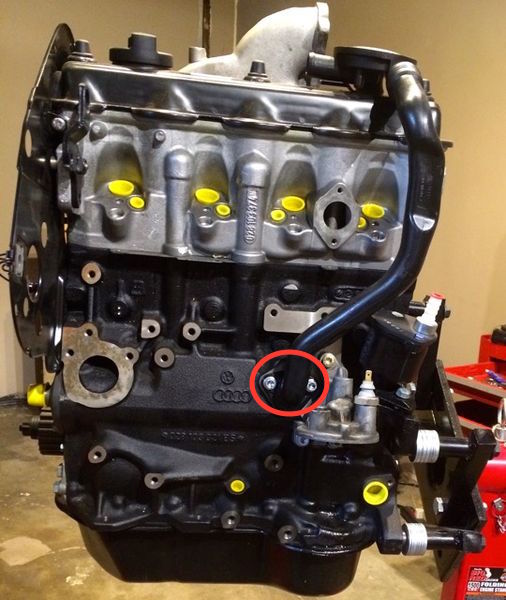
Photo
The red oval is the only bolts you have to tighten and the puck at the top goes into the breather hole
Oil Filter Flange
Tools:
Allen Hex Bit - H6
Reference:
Video
Youtube - Installing Oil Filter Flange
Photos
Here is the oil filter Flange installed:
Oil Filter Union
References:
This is maybe the easiest part to install. You just screw it in. I put some blue thread locker on it. It doesn't matter which end screws into the oil-filter.
End result:
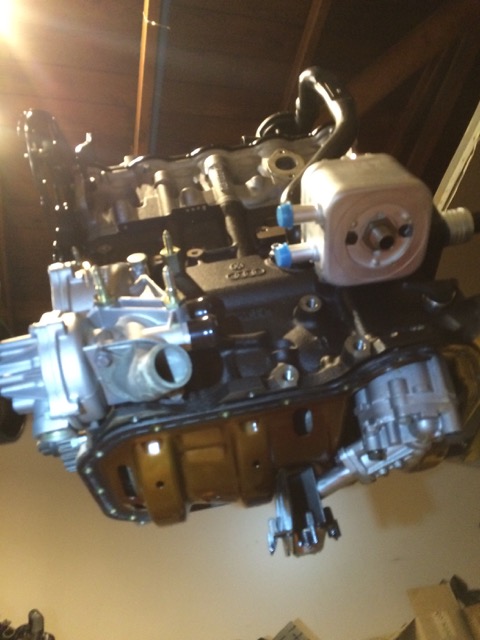
Oil Cooler
References:
Installation
This is pretty simple just slide it over the (028115721B - union tube) into the oil-filter assembly. The ports will face left of the engine indicated in the photo below. If you look at the top of the cooler and inside the flange you'll see the 'oil' feed line hole. Those basically need to match up.
Then place the oil-cooler over it and attach with the (068115723 - hexagon nut)
End result:
Oil Pan
This section will include details on swapping the 1.6na DV oil-pan for a 50 degree install, as also the 4cyl windage tray for it. At the same time we'll be swapping in an 82' diesel oil-pump to get the desired plunge shaft length.
NOTE: You must leave the oil-pan loose and mate to the transmission first THEN once the transmission is mounted tighten up the oil-pan along the edge level to the block.
References
ETKA - 82' Vanagon CS 1.6na Cylinder Block with Oil Sump
ETKA - 97' Passat AAZ 1.9TD Cylinder Block with Oil Sump & Windage Tray
Tools:
13mm socket 6point
DV Pan swap to AHU
Its as recommended to get longer oil-pan screws for the windage tray, but the stock 1.6na CS engine DV pan comes with the following 20 bolt sizes:
- M6X16
- M6X22
- M6X25
So, you could get lucky with two of the three possibliities, but you may want to measure the oil-pan bolt first.
However, the AAZ which does come with the windage tray comes with:
- M6X17
Since the above bolt size was supposedly used with the 1Z and AHU still,
These should be tightened to 20Nm
Now for the actual windage tray itself. It was included with the AAZ and sometimes with the 1Z and AHU engines, but was more common in the gasser inline 4's. It was NOT part of the 1.6na engine.
That said, my 1Z came with a windage tray, but sometimes the sealant is so bad it fucks the seal up and you'll need to get a new one.
The Windage Tray P/N is: 028-103-609A
DV Oil Pump Swap
References
Bentley 17-1 - 1Z / AHU specific
VW W42-011-294-103B p17-6
Once you have the oil-pan off the AHU you'll see the oil-pump. However, if you're long-block is like mine it may have a windage tray installed.
Photos
AHU Windage Tray Installed
Now you'll see the oil-pump as the silver device with the black tray delay off to the left. This is the oil pump you need to swap.
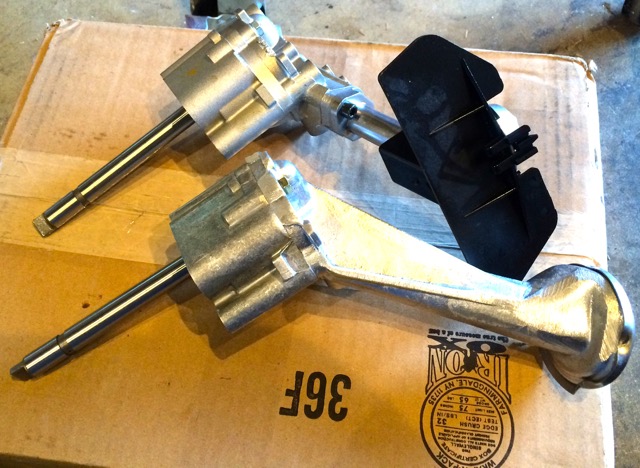
Here is the AHU (black part on it) oil-pump vs a new DV oil-pump
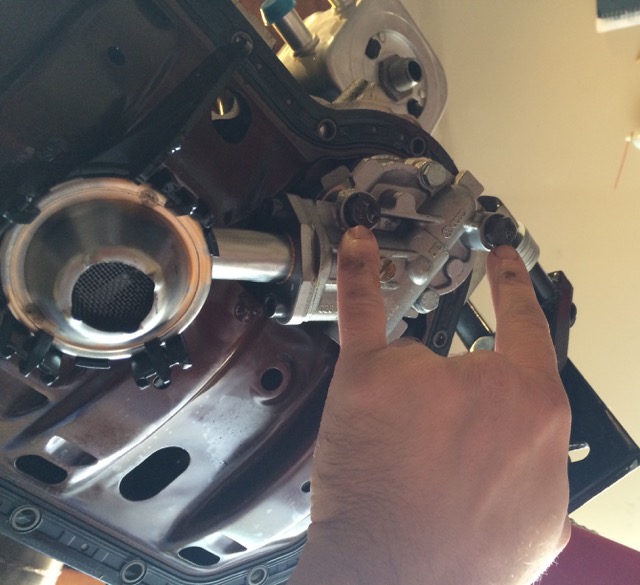
You'll see two bolts (black heads for me) where my fingers point. These will remove the oil-pump (13mm)
When installing the DV oil-pump the two pump bolts get torqued at 25Nm
NOTE: The AHU oil-pump bolts are LONGER than the DV oil-pump bolts. If you do not have the original DV Oil Pump bolts you need to get two of either of the following P/Ns: N01037510 or N0103753 with the spring-washers N0122265
Installing Oil Pump & Windage Tray
See the note above about final tightening AFTER the transmission has been mated to the engine!
First have some blue thread locker for the bolts. It helps keep everything snug.
The first step is to slip the baffle on before the oil-pump
Tooth Belt Guard Tensioner Roller
References:
Parts:'
1 x 028109243F
Tools:
13mm socket @ 25Nm
Installation
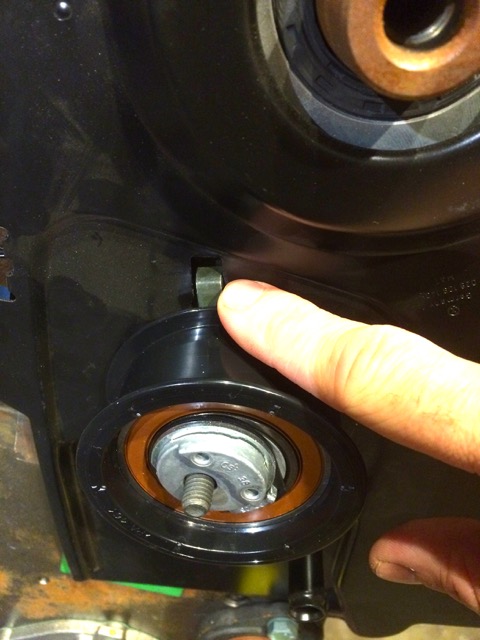
Very simple just slide it over, lock the latch into the engine cover plate. Then tighten the nut @ 25Nm
Video
Photo
This is a photo of where the locking slot of the tensioner goes
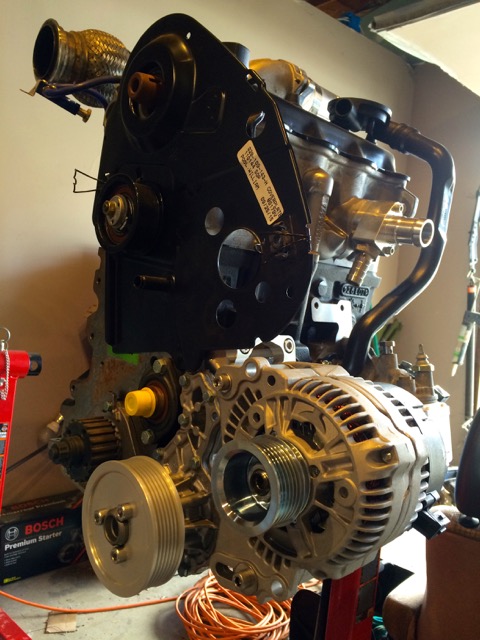
ABF Serpentine Setup
Since I don't have power-steering nor do I have air-conditioning, I can simplify my setup and make it more reliable with a serpentine setup rather than a v-belt system.
This can be accomplished via various methods as mentioned below. I went the ABF way
Reference
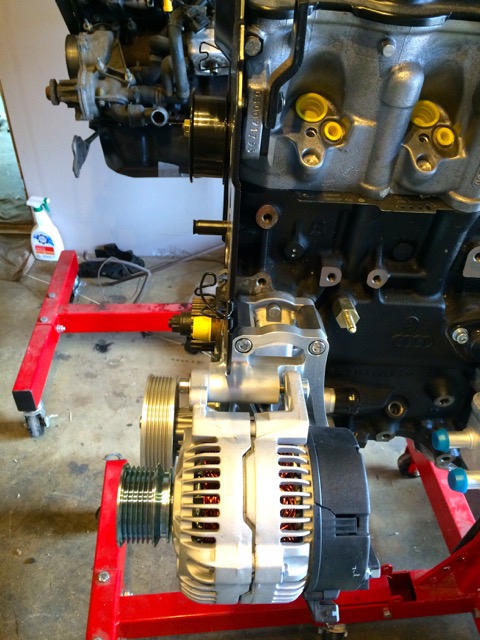
I ended up using a system from iABED Industries found on the VWVortex
He makes a custom bracket, that's really beautiful, but if you want to source / find your own VW specific parts read these threads:
The Alternator I ended up using was an ABF Bosch reman 90a - AL0187X (VW # 028 903 025 P)
Photos
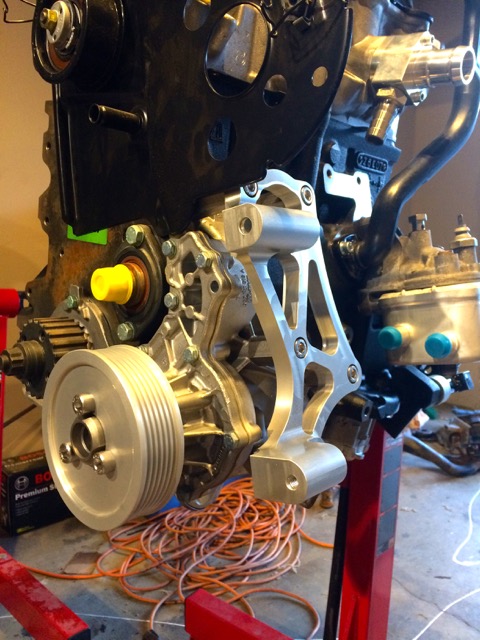
iABED Industries ABF Bracket
Alternator installed with the bracket and pulley's installed.
Intermediate Shaft Pulley
References:
Parts:
- 1 x VW# N012708 - 2sprocket woodruff key
- 1 x VW# 028-115-017E - intermediate shaft (in case yours is broken, don't have one off a used engine, etc.)
- 1 x VW# N0101371 - Hexagon Bolt M12X1,50X35
- 1 x VW# 027109143 - washer
Coolant Pump
References:
VW; W42-011-294-103B 19-6
Tools:
19mm wrench
Blue thread Locker on bolts
Installation Notes:
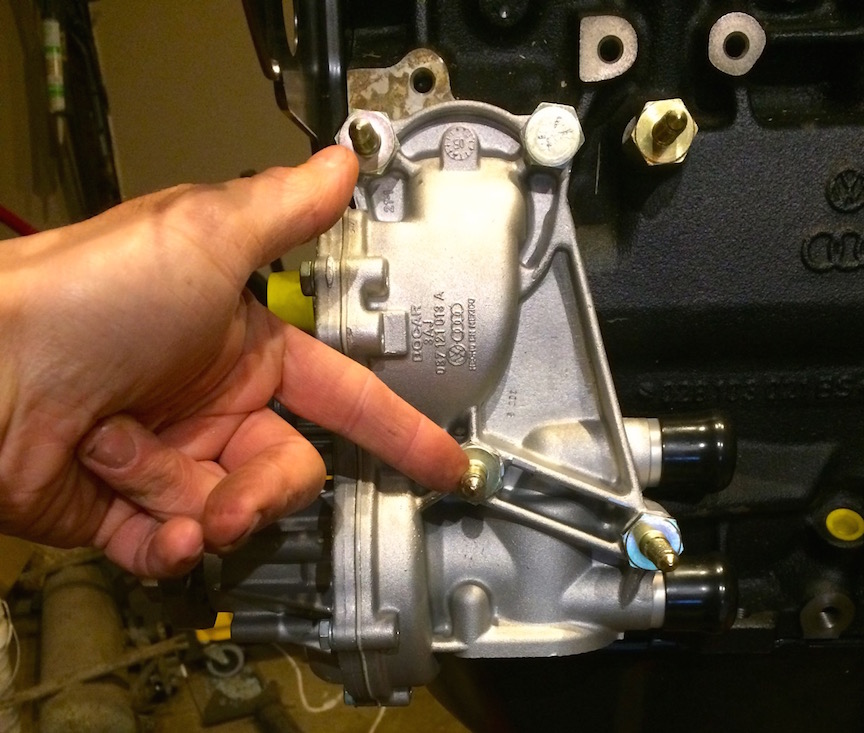
Make sure your coolant pump came or you purchased the o-rint that goes between it and the long-block.
There are three shoulder bolts that look the same;
1 x 028-260-821
2 x 028-260-821A
The one my thumb is pointing to is 028-260-821 which is shorter than the two 028-260-821A that my index finger points to
The other two which are not clear in the reference points go as the following:
1 x 028-260-821D - hexagon bolt; M8X34 - This is the first one to the right of 028-260-821.
1 x 028-260-821C - stud with shoulder; M8X17X24 - this is to the right of 028-260-821D
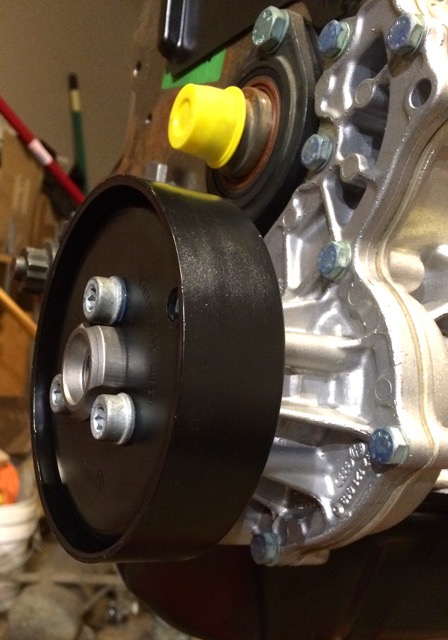
Water Pump Pulley - OLD Non Serp Setup
This is what I intended to use, but later changed to something else. A simpler ABF serpentine setup which I'll reference when I start that.
Reference: wiki
Tighten bolts to 25Nm
Tools:
Torque Wrench
Allen Hex Bit - H6
Screw Driver
Installation Notes
There's a round hole on the pulley that you can put a screw driver into to lock it so it doesn't turn while you tighten the bolts.
Proper Tool Warning!!! I found out after doing this from a peer-reviewer the tool you want is the water pump pulley tool. You can find it under one of these reference P/Ns:
96280, SCH96280, UN1203280
In the photo below you can see it going right from the top bolt.
Also, note the deeper part of the pulley goes towards the engine or the VW P/N faces away from the engine.
Thermostat & Housting
References:
VW; W42-011-294-103B 19-9
Tools:
10mm socket
Blue thread Locker on bolts
Installation Notes:
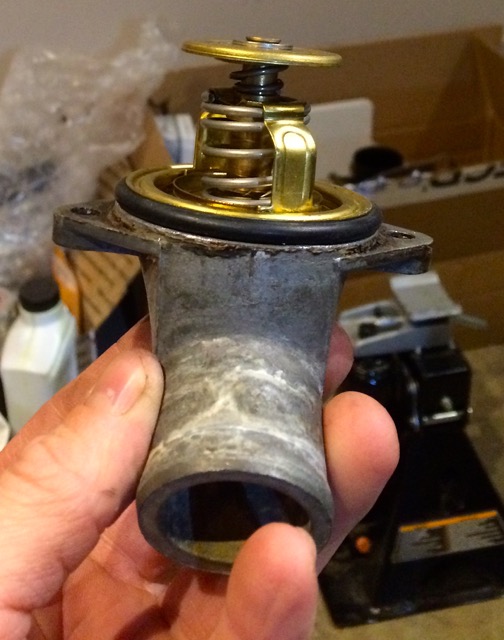
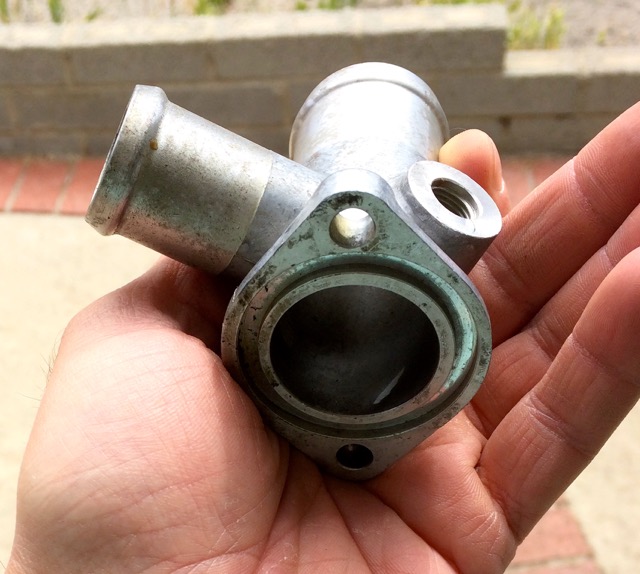
When screwing the housing to the water-pump, it may not look like it will seat in; however, the more you tighten the bolts the more it will slide up with the O-ring.
1 x 4256.87D50 - 87 degrees thermostat
1 x 038-121-119B - o-ring
2 x N902-809-04 @ 10Nm
Photos:
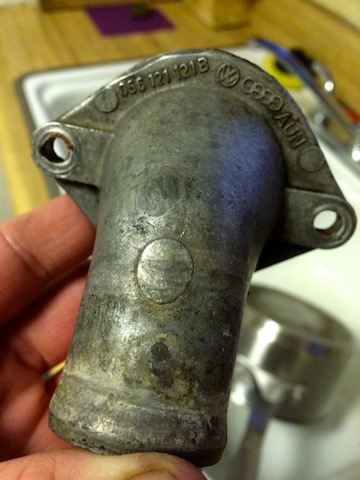
The thermostat housing used from a 1.6na engine. It's an alloy one:
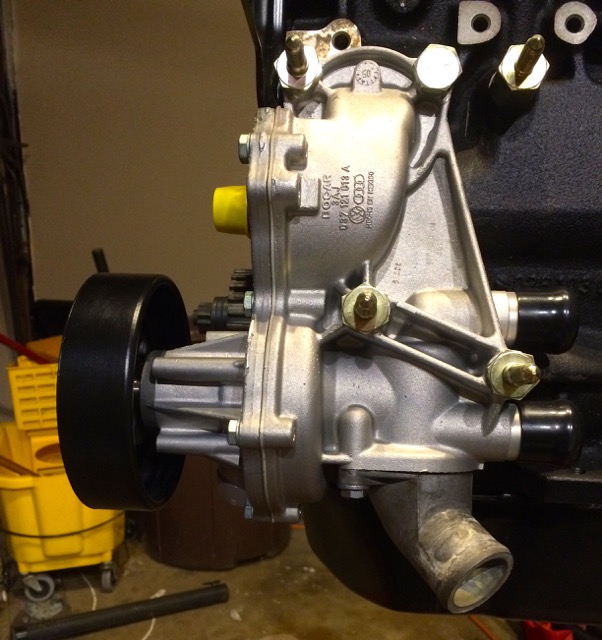
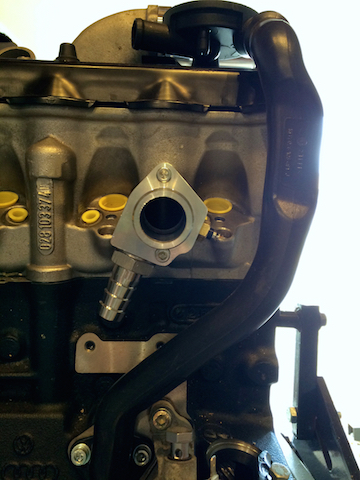
This is how the mounting orientation should go against the coolant pump
How it all looks installed
Coolant Flanges
References:
- ETKA - 1982 Vanagon, coolant hoses and pipes DIESEL:CS - This helps show where on the CS it's flange would go
- ETKA - 1997 Passat cooler for coolant reservoir flange - This helps show where on the AHU it's flange would go
- Samba - AAZ Coolant Sensor
I thought long and hard how to approach the mTDI coolant flange dilemma.
There's a few various options to accomplish this:
- Use the 1.6na aluminum flange p/n 068-121-133M with an adaptor plate to position the adaptor similar to the AHU orientation. The photos I saw of this looked like it'd cause a possible other leak, looked hooky, and just bad in my eye.
- Use the later AAZ sensor p/n 357-919-501
green ring) on the plastic AHU flange p/n 028-121-132A This solution is bad for two reasons to me. First it's plastic and in my mind more prone to cracks. Second now you've mix-matched the sensors on the engine.
- Custom baby!
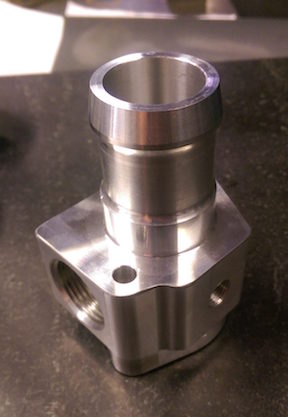
In the end I felt a custom solution was the cleanest and best solution. For the following reasons:
1.) The material will last the lifetime of the van similar to how the 1.6na flange would; however, using the 1.6na flange you have to modify the hose route which isn't too clean to me; more parts. Or you would have to create a modification plate which in the photos I saw looked kinda hooky more possible leaks.
2.) I could have went with the normal flange itself and blocked the over-flow barb (which over time may need replacement) and used a later AAZ temp sensor (for coolant temp & glow plug), but then you have a mix-match set of sensors on the van. This would make over-all support a bit more "specialized". The custom flange mimics the diesel setup to the T.
I already have a sensor at the front of the engine block for the glow-plug, so that'd just be 'blocked up' using an AHU flange which is dumb. The engineer in me says mixing sensors makes supporting more a chore.
Custom mTDI AHU diesel vanagon coolant flange from Legacy Mold & Tool talk to Charlie! (502) 348-8151
NOTE: The bolts on the flange are M6x55 and torque at 7nM, just use blue threadlocker and tighten snug by hand
Photos
Comparison to the CS one (068-121-133M):
Also, I am trying to swap the AHU flange 028121145 (Flange With Glow Plug Mounting) with a 1.6na 068121145K one.
Injection System Build Up
References:
ETKA - Injection nozzle pressure pipes 1.9ltr. diesel eng.: 1Z,AHU,AFN
TDI Injector Install Howto / File:Injector install howto.pdf
VW TDI 1z/AHU timing belt installation
Tools:
- 17mm wrench
- 15mm wrench
- 13mm socket
- 10mm socket
- Ratchet and various extensions Torque wrench
Installing Injectors
This part is assuming you have either cleaned/calibrated the used injectors you're using as install any new nozzles. If in doubt give KermaTDI a ring!
The Details (my collected research before above work)
There's a decent article on TheSamba about what parts you'll need
http://www.thesamba.com/vw/forum/viewtopic.php?t=410813&highlight=ahu+intake
What isn't needed from stock AHU Engine
If going mTDI the following are not required:
- electrical harness
- MAF sensor
- MAP sensor
- IAT sensor
- Injector #3 needle lift sensor
- Fuel temp sensor (inside IP)
- N75 & N18 valve
- Crank Speed Sensor; you just need to plug the hole up which the sensor without the wire does well at. However, that looks tacky and leaves a busted sensor. The other option is to buy a plug:
Air Filter
Donaldson filter G065433 install
Tranny Upgrade
The TDI won't have any difficulty cruising at 3500 or even a bit higher. The only downsides are noise and a bit of a drop in fuel economy. If your preference is to cruise at 65, then I would gear 3,000 @ 65MPH. With that gearing you will be able to cruise at 70-75 if need be and will still be high enough in the rpms @ 65 to develop enough HP for cruising with a 'cushion'.
Max torque on a stock TDI is around 2200 rpm. Max hp is around 3800 rpm. The TDI seems happiest in a Vanagon between 2600 and 2800 rpm. You are above the max torque, but well below the max hp. Your gearing and tires will dictate what speed that is. In this ratio, I would think a Westy would be more the range of 2700-2900rpm to account for the extra weight; ~700lbs last I heard!
Till a better place linkage differences here
Obtained a DK air-cooled transmission
Here are some good calculators:
Betsy's decided rebuild is the below including a LSD
1.14 - 3rd
0.70 - 4th
4.571 FD @ 0.70 - 2672 @ 65mph
4.571 FD @ 0.70 - 2878 @ 70mph
Engine Mounts
Frank Grunthaner SAAB Hydraulic mount setup
http://www.thesamba.com/vw/forum/viewtopic.php?t=403215&highlight=ahu - rsxr - Saab engine mounts
Injectors
IDI Parts had the Bozzio Sprint 520's for around $175.00. They are supposed to be equivalent to the nozzles that came in the european delivered TDI's.
http://forums.tdiclub.com/showthread.php?t=276798&page=4
Clutch
http://www.vw-t3-bus-shop.de/en/19-tdi-modification-parts-for-vw-t3-bus
http://www.vw-t3-bus-shop.de/en/adapter-plate-for-turbo-diesel-gearbox-on-golf-starter -this adapter nicer than the switch a motor since its recessed for the starter alignment
http://www.vw-t3-bus-shop.de/en/clutch-dorn/gearbo...ion-to-org
http://www.vw-t3-bus-shop.de/en/abdeckblech-zum-schwungrad-aus-edelstahl
Intercooler
Water Pump Belt
http://www.thesamba.com/vw/forum/viewtopic.php?p=7673431#7673431
If you don't have A/C or PS, you can use the VR6 water pump pulley (028-121-031-E) and use the serp belt to run the Alt and water pump.
Decided to get a serpentine setup done via INA Engineering:
http://forums.vwvortex.com/showthread.php?3871186
http://forums.vwvortex.com/showthread.php?3379568-ABF-alternator-bracket-Part-number
http://forums.vwvortex.com/showthread.php?3335420
Oil Pump
P/N:
068-115-105-BP
This is the DV oil-pump which is required if using the DV oil-pan
Oil Cooler
http://www.thesamba.com/vw/forum/viewtopic.php?t=603839&highlight=ahu+water+pump
P/Ns:
027117021E cooler
028115721B tube
Exhaust
4 bolt trapezoid MK2 AAZ exhaust manifold P/N 068-129-591G
Intake
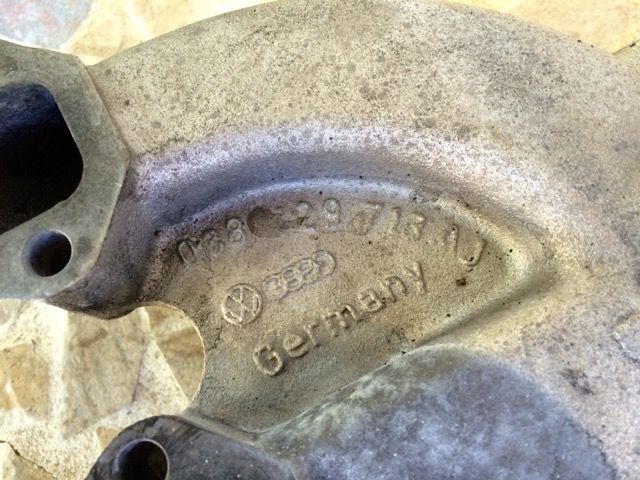
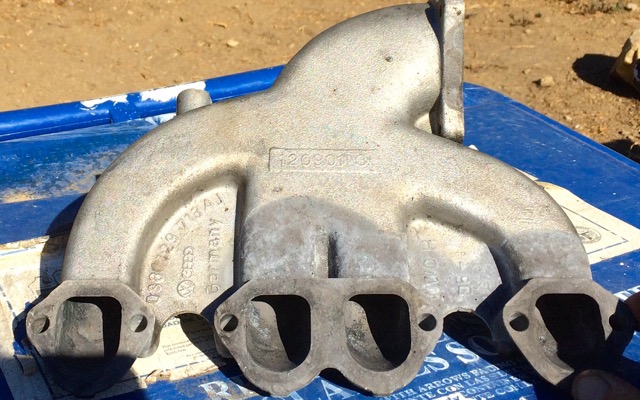
The single large 3 bolt intake on the PD Intake Manifold that connect to your IC piping faces FRONT of the van typical on AHU install These terms are used to describe the same thing Driver side exit, right side , euro passat, longitudinal and is one of these part# 038129713AJ 038129713AG
The two above intakes would require an EGR delete down-pipe
However, if you have a 028129713N which is on a Golf 1z setup would also work a-bit more restrictive with the air.
Parts to Obtain List
NOTE: some of these parts you can obtain from the used engine. However, as I want to use the used engine for another project someday, I rather replace what I need for it on the new long-block. Everything below takes a Long-block 1Z/AHU as the base up to an installable engine.
I don't include pricing since that's a fluxing item whereas a part description / number won't.
Transmission
I'm starting with an 82' diesel, so I *have* to upgrade my transmission or expect to blow shit up early on.
I'd love to go 5spd, but not knowing enough to go this route, I have decided on a rebuilt DK (80-82 air-cooled Vanagon transmission).
I would assume "most" going to a TDI would really want to regear their transmission or swap out their transmissions.
Decision
Since each setup is different for me I decided on the following:
AA Transaxle - Rebuilder
My rebuild included:
- 3rd 1.12
- 4th 0.70
- LSD
For my tires my RPM ratios look like:
4.571 FD @ 0.70 - 2672 @ 65mph
4.571 FD @ 0.70 - 2878 @ 70mph
Engine
Misc
Belt Guards
Reference:
Bentley 15a-11
P/Ns:
028109143H - 1Z/AHU engine cover plate
Injection
The below are related to the injection system
Injectors
Injector #1 #2 #4 - 028130202P
Injector #3 - 028130202Q
Injector Holders
4 x VW p/n 028-130-206
Injector Nozzels
NOTE: What type of nozzles to use are more a personal preference of what you're give/take on the engine's performance you want to have.
Okay, it's likely you'll end up with a pair of used injectors, and you'll want to get them tested and put some new nozzles on them.
Very few place allow installation of customer supplied nozzles, so you usually buy the nozzles at the same place you do the calibration/mounting etc. I used KermaTDI
I went with Bosio DLC 764's for my nozzles.
Injector Fuel Lines
TDI AHU Steel Injector Fuel Lines - 028130301M/2M/3N/4N Injector Lines
Two sources I found new:
Crank Case Breather Valve Assembly
Reference:
ETKA - Ventilation for Cylinder Head Cover Diagram
P/Ns:
1 x 028129101D - PCV/CCV Valve (A3) (B4)
1 x 028103491J - CCV Breather Tube (A3 B4 AHU 1Z)
1 x N 90466301 - o ring for breather tube
1 x 028103500 - CCV Valve Rubber Boot
Misc Brackets / etc
Below will list associated brackets that will need to be placed on the AHU long-block including any fasteners/hardware.
Oil Filter Flange
Reference:
VW Repair: W42-011-294-103B p13-10
P/Ns:
053115417A - Oil filter flange; This flange has been used for all the 1.8-1.9 gas and diesel engines (AAZ, 1Z and early AHU). The difference being the later AHU adaption have two 10mm ports and one 12mm port (for the Banjo Bolt N0210717) instead of the three 10mm ports that the gas/ABA engines use. There's no 'real' way to know which you get by searching for the P/N. Your best luck appears to be searching for a "MK3 TDI oil filter flange" or maybe "AHU" also in the search string.
There's also two other indicators of the proper one you received.
First the third port is larger than the first two. (photo coming soon of comparison)
The second visual indicator is a bit more positive you got the right one from what I have read on the forums and Parts Base.
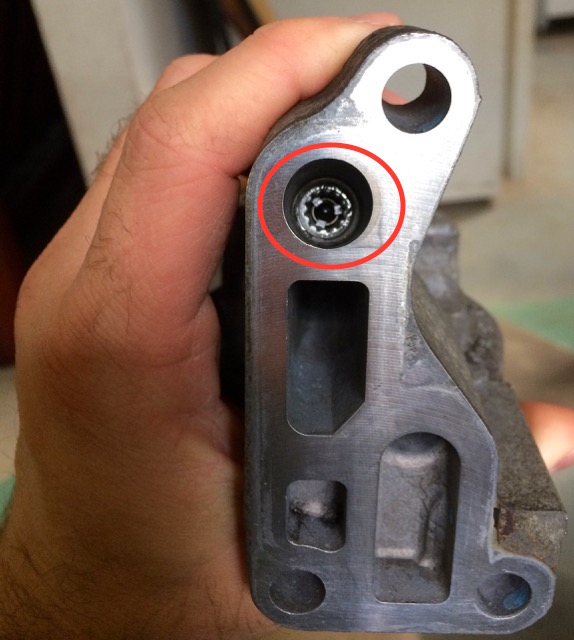
Within the below photo in the red circle is 028115436 - choke; M12X1,5; AAZ,,AHU,1Z which is what you want for the diesel engines. From my research, and what I received the first time, gasser engines do not contain this.
- 1x 028115436 - choke; M12X1,5; AAZ,,AHU,1Z
- 1x N0160243 or N0160241 - sealing plug; M10X1; ADD,AHU,1Z
- 1x N0138115 - o-ring; 10X13,5; ADD,AHU,1Z
- 2x N0903151 - socket head bolt with hexagon; socket head (combination); M8X25
- 1x N90425401 - socket head bolt with hexagon; socket head (combination); M8X40; ADC,ADD,ACC,; AHU,1Z @ 25Nm
- 1x 028115441C - oil filter seal
- 1x 068919081A - Oil Pressure Switch [OEM] (A3)(B4)
- 1x N0210717 - Oil Filter Oil Feed Line Banjo Bolt
Vacuum Pump
References:
VW Repair: W42-011-294-103B p13-10
P/Ns:
1x 028145101A - AHU vacuum pump
1x N0102336 - hexagon bolt; M8X28 (13mm @ 20nm)
1x N01224110 - spring washer; B8X15
1x 028905256 - bracket
1x 068145117B - Vacuum Pump Bottom Sealing Washer
Alternator
VWDiesel.net Thread: W Terminal on TDI Alt
A AL0184X 120a alternator will work and includes a W spade
1997 Jetta 1.9 TDI alternator 90a
P/Ns:
028903119AA - Alternator Pulley
028903143AB - Alternator bracket
Glow Plug Goodies
028971766 - VW Early TDI 2 Wire Glow Plug Harness (’96-01)
0250202022 - VW 1Z AHU ALH TDI Bosch OEM Glow Plug Set ('96-03)
Clutch
Sachs G60/VR6 Clutch & Flywheel Kit (A4)(A5) [sachg60vr6a4]
Modified Bernd Jager TDI input shaft
Bernd Jager TDI flywheel cover plate
Oil Pump
For the DV oil-pan you need the DV oil-pump
P/N:
068-115-105BP
Oil Cooler
Reference:
P/Ns:
1x 028117021E - oil cooler
1x 028115721B - union tube
1x 068115723 - hexagon nut; ADC,AAZ,ABA,; AHU,1Z
Coolant Pump
Reference:
P/Ns:
1 x 037-121-013A - Coolant Pump Assembly
1 x 056-121-121B - Alloy thermostat housing
1 x 4256.87D50 - 87 degrees thermostat
1 x 038-121-119B - o-ring
2 x N902-809-04 @ 10Nm
1 x 037121121A - Pipe Union
1 x 1H0121687A - o-ring; 28,5X3,8
1 x 038-121-119B - o-ring; 50X4
1 x 028-260-821 - stud with shoulder
2 x 028-260-821A - stud with shoulder
1 x 028-260-821D - hexagon bolt; M8X34
1 x 028-260-821C - stud with shoulder; M8X17X24
2 x N 902-80-904 - hexagon head bolt (combi); M6X22
3 x N903-08-607 - socket head bolt with; inner multipoint head; M8X14
1 x 056-121-121B - this is NOT the normal AHU thermostat housing flange. Instead it's the one used for the 1.6na engine. However, it is a metal alloy and more durable than the newer plastic ones. It also has the proper hose fitting for the vanagon diesel hoses.
6PK1045 Serpentine Belt; Alternator
The Tank - Rocky Mountain Westy
VR6 Water Pump Pulley
P/N 028-121-031-E
Intake
Intake PD130 038129713AJ
I wanted to replace the gasket and all mounting bolts
ID Parts Intake Manifold Cleaning Kit (AHU/1Z)
Which includes the parts laid out in:
ETKA 1997 Passat Diesel Intake Manifold
The kit itself includes what I need: gasket & mounting bolts
If obtaining a used intake (which is MOST likely the case there's various methods of cleaning it out.
In my case, I used multiple (two-three days twice a day)power-washings after they sat with oven-cleaner sprayed on their intake ports.
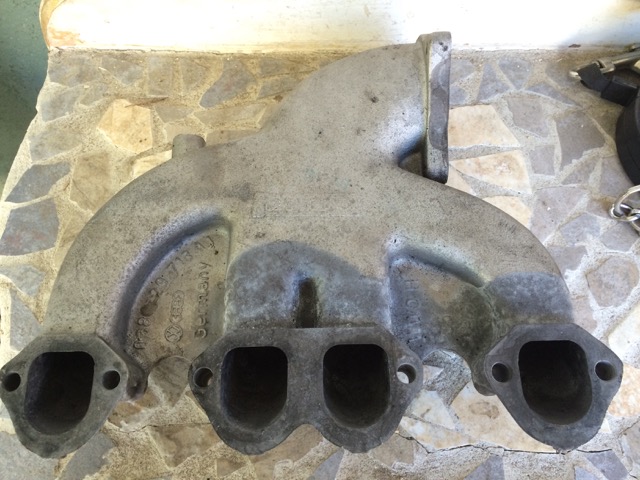
It should look like this before putting it on the long-block
Exhaust
Reference:
P/Ns:
1 x 068-129-591G - MK1 exhaust manifold trapezoid flange
8 x 116-217-119-54 - Copper plated exhaust manifold nut (8 per manifold) @ 25nm (18ft lb)
8 x N900-95-501 - Exhaust manifold OE washer
4 x 028-129-589B Exhaust Manifold Gasket.
EGT Probe
Turbo
4 bolt trapezoid MK2 AAZ exhaust manifold P/N 068-129-591G & flex down-pipe 3" & K14 Turbo
Turbo was purchased from Tony Sanchez from a 50 degree setup of his.
PD130 hacking
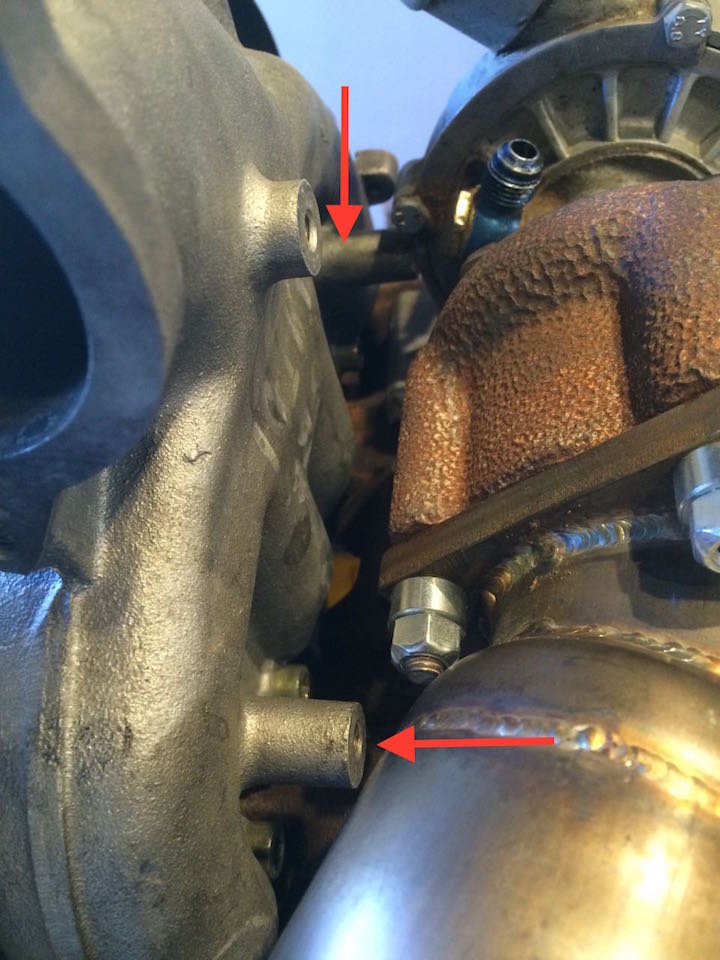
The turbo isn't clearing the PD130 bosses and mating cleanly.
Here is a youtube and photo of what I'm talking about:
Arrows pointing where it is not clearing
Hack off the bosses!
Installation
The four bolts that are used to mount the turbo to the flange are done @ 35Nm or 26ft lb
IC - A2A
SAAB Classic 900
Silicon Coolant Hose Kit
From BeeJee

